How to do Stick Weaving on a Y-Shaped Branch · Craftwhack
If y'all're like me you lot have a ton of yarn left over from knitting projects and you lot don't quite want to throw it out, but you aren't sure what to exercise with it.
Stick weaving is the perfect respond for when you take a bunch of yarn leftovers that you want to use up. Plus, if you've never tried weaving this is a great beginner project!
Mayhap you've seen branch weaving projects and take been wanting to try it yourself. I had been wanting to for a while, and then every Y-shaped branch I saw was a reminder. One day I simply grabbed a few of the branches from our back k, lugged out my yarn (I have a ton), and got weaving!
Stick Weaving Supplies
Y-shaped stick
Yarn
Tapestry or weaving needle
Fork (optional)
How to practice Stick Weaving
Discover a good solid stick with a nice 'Y' shape.
Start by tying a knot down in the bottom of the Y on ane side.
Bring the yarn across the Y to the other side and wrap fully around the stick one full time earlier going back to the original side of the stick that has the knot.
Repeat this continuously all of the mode up the summit of the Y. If you run out of yarn, just beginning with a new slice where yous left off, tying a knot with the yarn equally your new starting point.
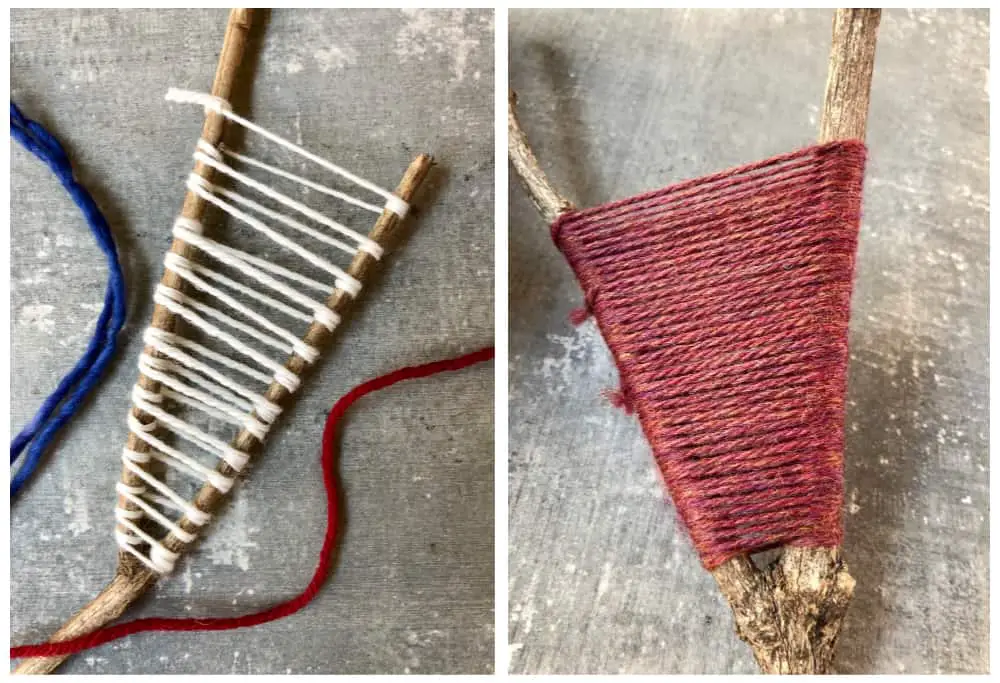
The spacing of the "rows" of initial yarn in the "Y" is up to you. For one, I made the rows most ¼" apart, and for the other I had them run very tight correct next to each other. This is a fun time to experiment and run across what you like the expect of, and how you similar to piece of work. Information technology was SO MUCH easier to weave through the yarn when it was further apart.
Once the Y is complete, start at the top of the Y on 1 side with a new color of yarn. A weaving or tapestry needle is a must, because yous'll be threading the yarn over and under the rows of yarn.
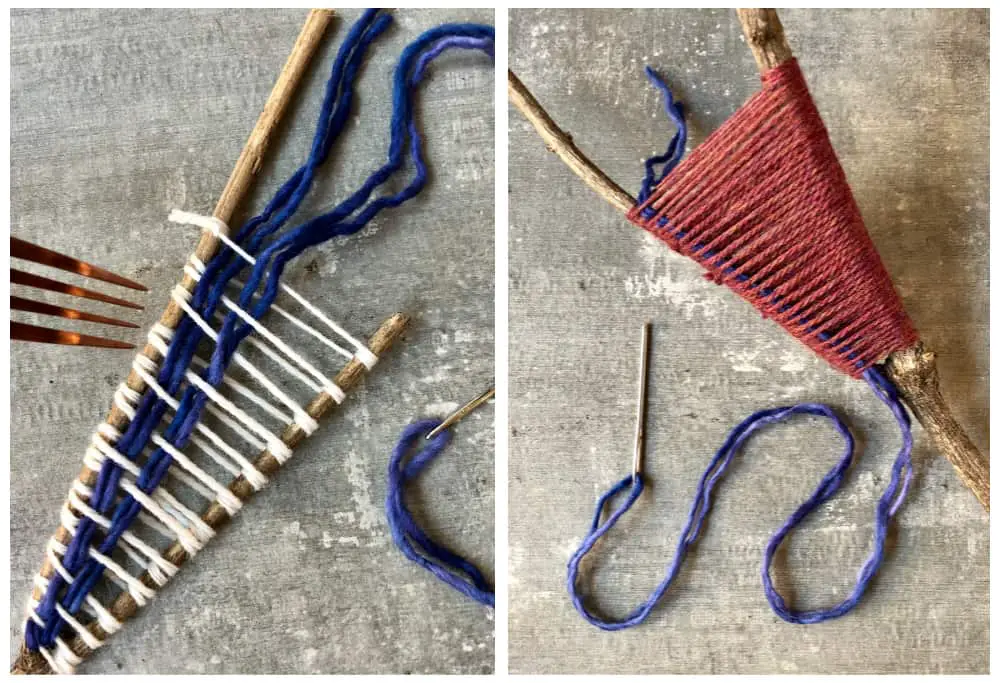
I wove a couple of rows with the first color, two on each side of the Y.
I used a fork throughout the weaving to press the rows of yarn close together and tight to the edges. At first it will seem like this isn't working, just later on you add more than rows of woven yarn, the fork will pull the rows tighter together.
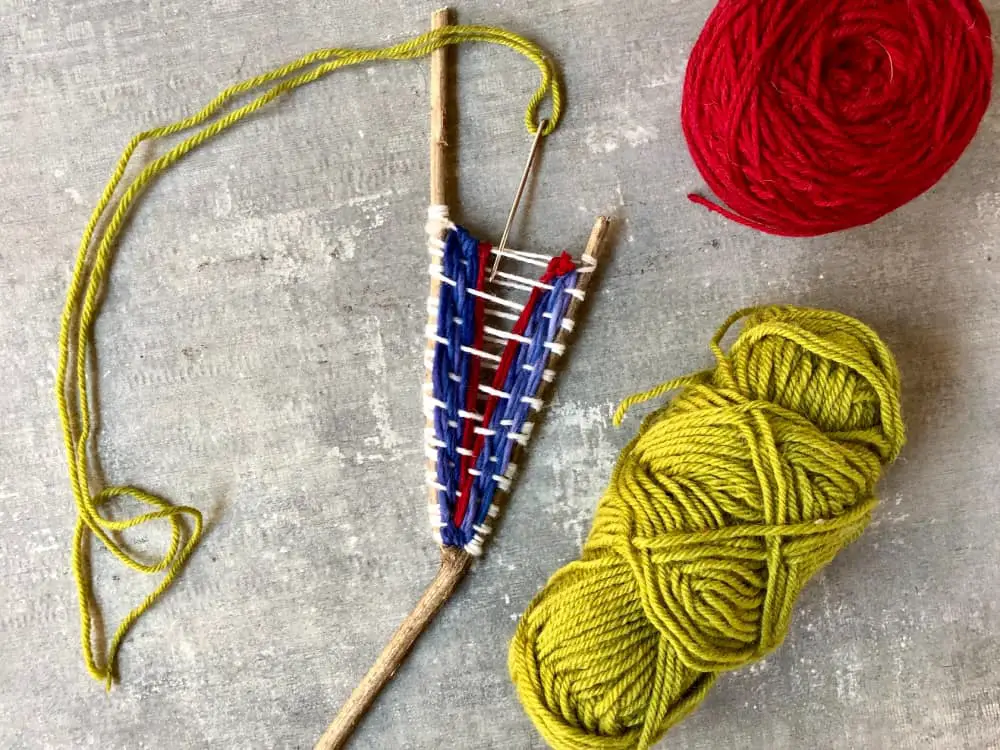
Every bit you weave, the Y volition go fill in, creating your pattern of different colors.
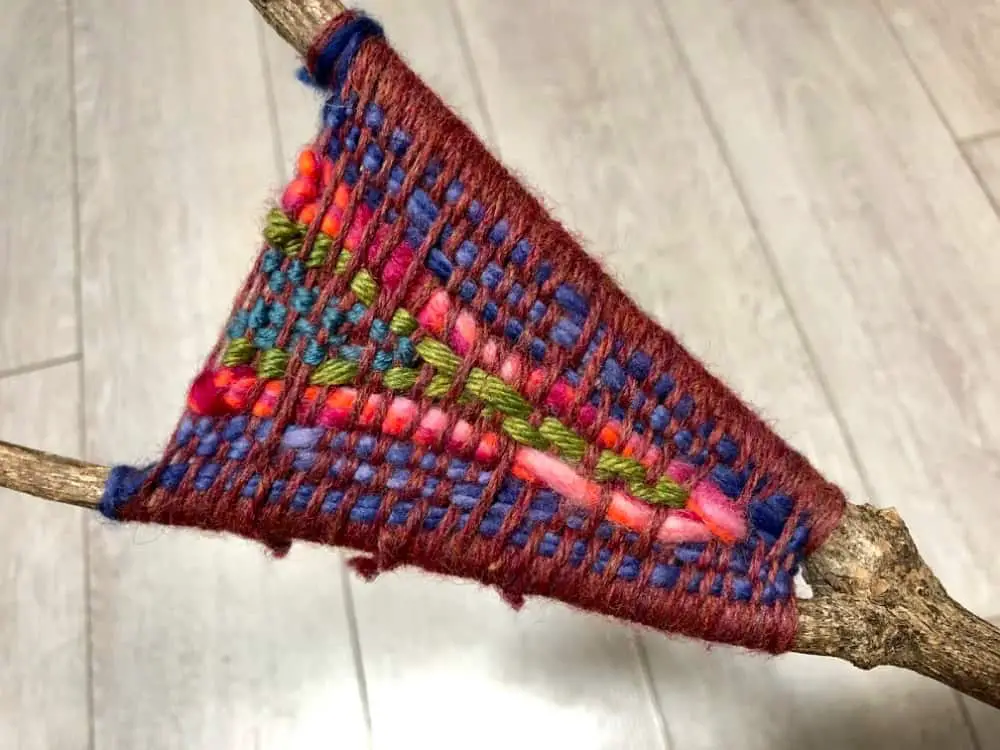
As you can meet, on 1 of the weavings I continued to wrap a color upward and down the part of the stick that wasn't a function of the original Y. Take fun with information technology and wrap the whole stick in unlike colors!
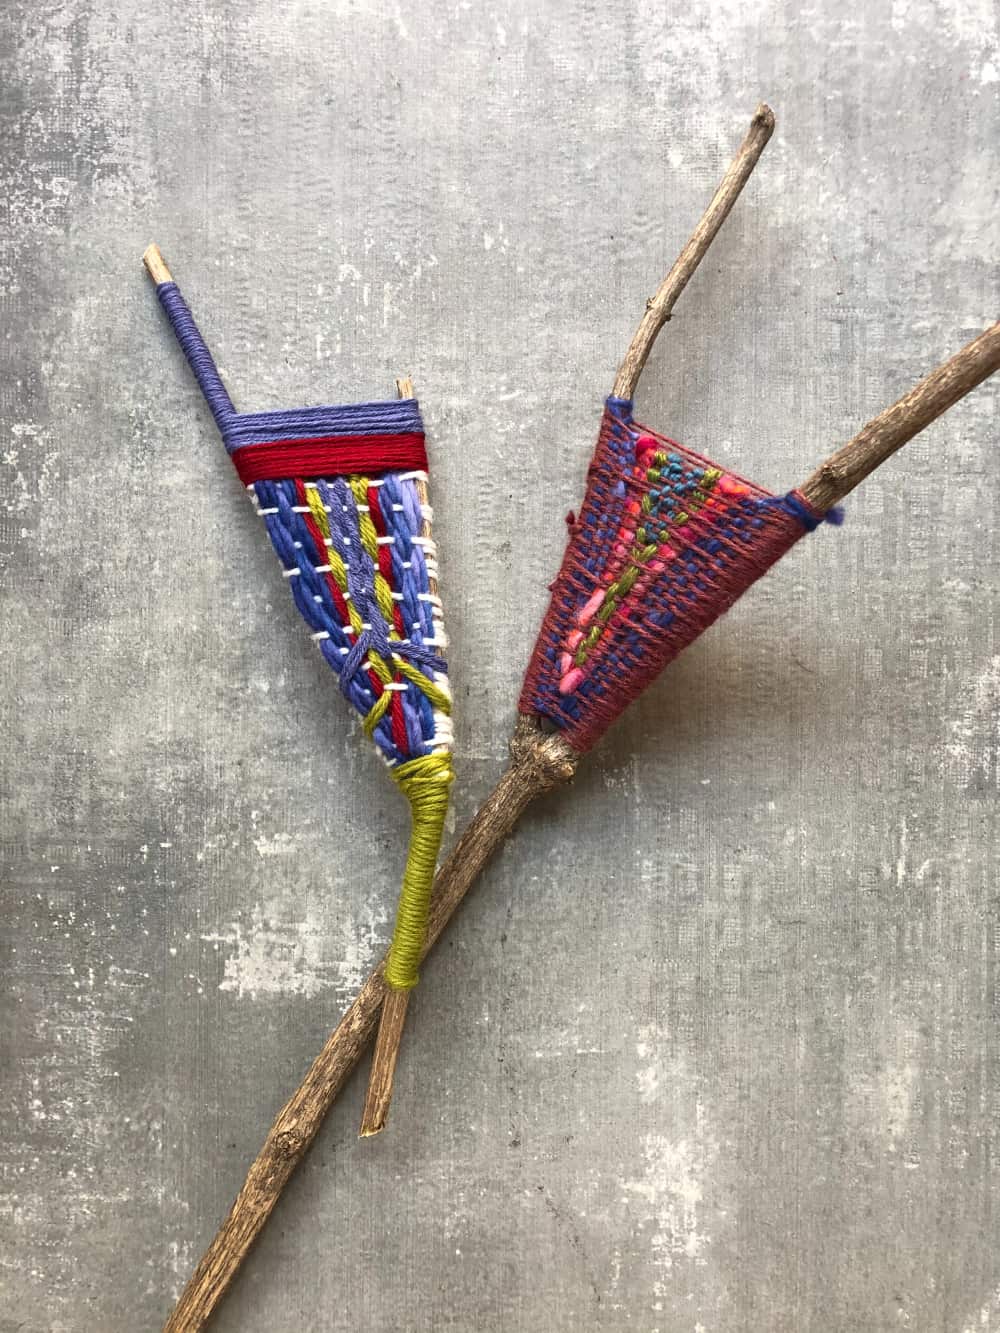
Necktie the loose ends of the yarn with a knot, and put a driblet of gum on them or constrict them in behind.
Voila! You lot'll run into once you start that there are so many different ways to weave with yarn and sticks, and you'll want to brand lots of dissimilar versions in one case you kickoff!
Source: https://craftwhack.com/how-to-do-stick-weaving-on-a-y-shaped-branch/
0 Response to "How to do Stick Weaving on a Y-Shaped Branch · Craftwhack"
Post a Comment